(Winter 2026)
Rob Roy Cedar Strip Canoe:
● Intro & Station Forms● Building the Strongback
● Cedar Strips
● Stripping the Hull
Cedar Strips
After considering all the possibilities I decided maybe the quickest and safest option would be to buy precut strips from a reputable supplier.
After contacting the nearest one I could find, I learned that Western Red Cedar is expensive and shipping is really expensive! Although there were options available: Northern White Cedar was a little less expensive, there are several lengths available each at a different price, bead-and-cove vs. square edged, and I could pick up the strips myself rather than shipping them – a 4-hour round trip.
I took down all the information, tried to determine which lengths and how many feet to buy, priced out all the various options, mulled it over for a few days, but just couldn't bring myself to call and place the order – something just didn't feel right.
Then, out of nowhere, I seemed to recall a friend and occasional bandmate may have once mentioned he did a little woodworking. Maybe I could give him a quick call just to see if he had any helpful info – perhaps a more local source for cedar.
Well, miraculously, everything changed with that one phone call. Not only did he have a complete wood shop and offered to cut the strips, but he also had a supply of 50-year old, quarter-sawn cedar shingles just taking up space in his barn that he was happy to donate to the project!
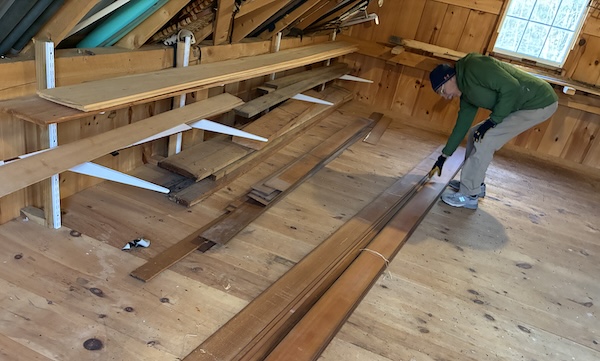
A couple days later we were up in the second floor of his barn checking out the wood. There were 2 stacks of 15 footers and an additional pile of some 10 foot stock.
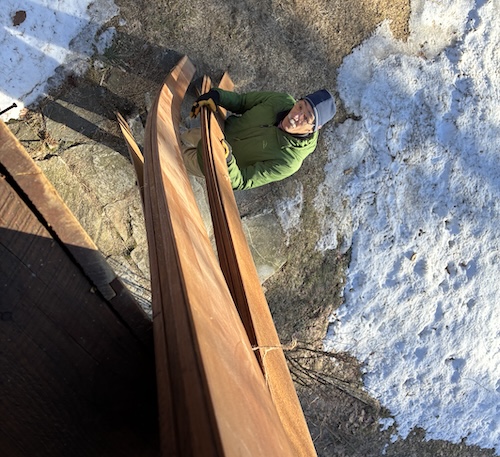
We lowered them down out through some large swinging doors…
…and got them down to the shop.
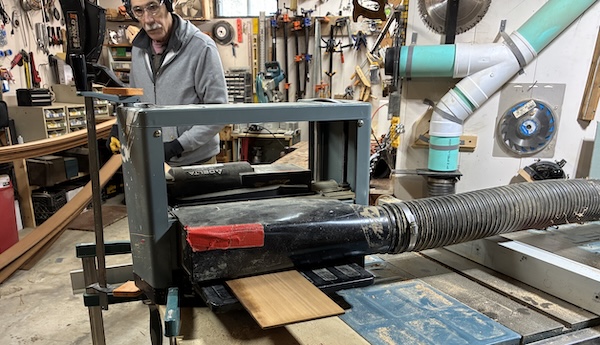
Three passes through a planer got the tapered shingles down to 1/4" for most of the width.
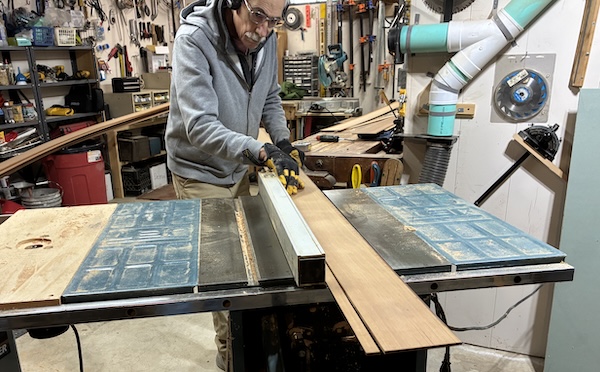
We were able to get four to five 3/4"-strips from each shingle before the thickness dropped below 1/4".
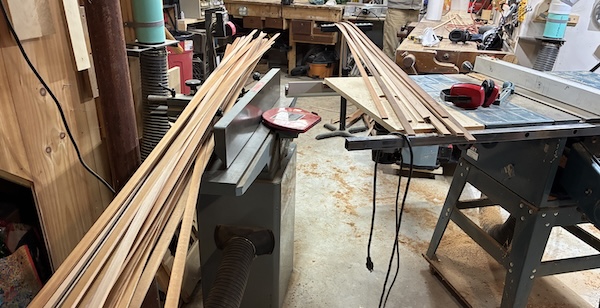
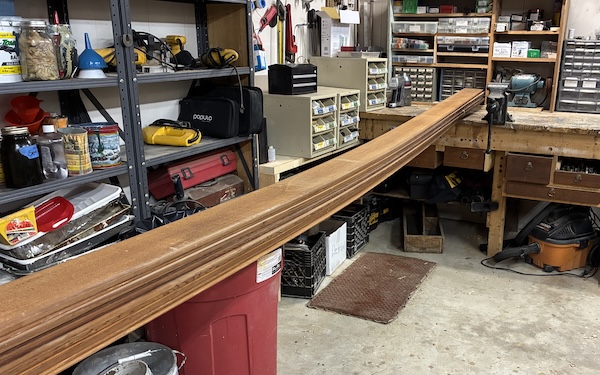
We separated them by length…
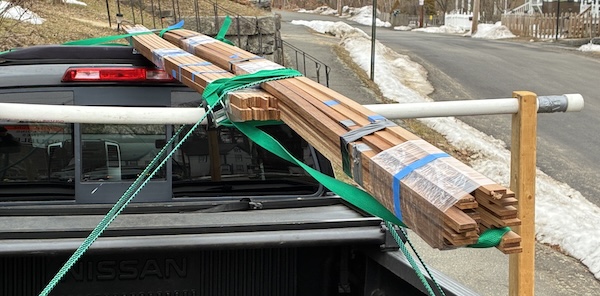
…then bundled them up and loaded them onto my homemade kayak transport setup.
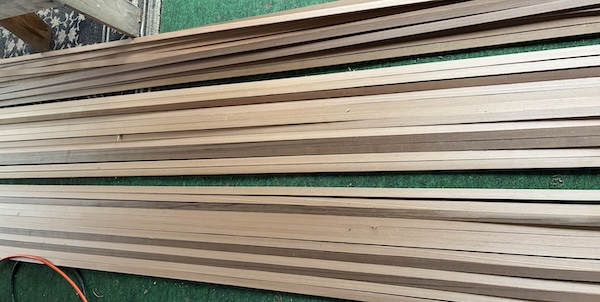
There were 3 distinct colors in the mix. The 15 footers were mostly light but we got 6 dark strips. Then there are several medium-colored 12-foot strips. I've laid out a few to try some possible color schemes.
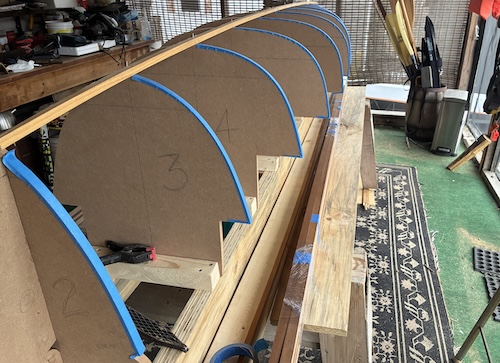
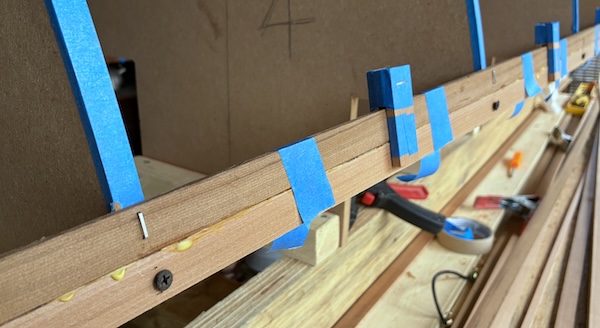
In prep for the strips to be installed, the form edges are covered with tape to keep the strips from getting glued to the forms.
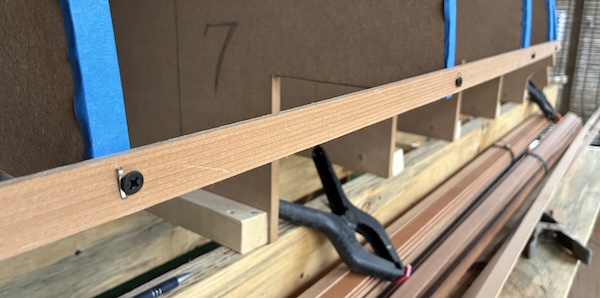
I'll be using staples to attach the strips but the first one on each side is reinforced with 1" sheetrock screws to provide a solid base.
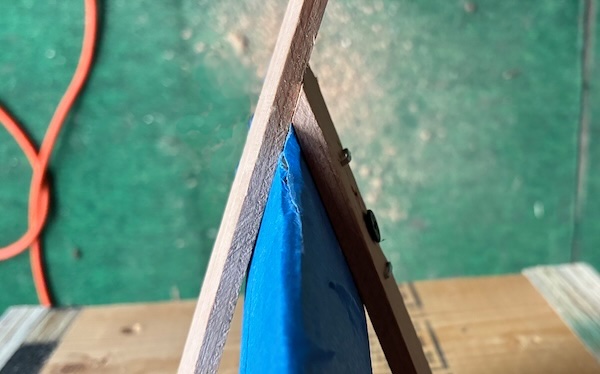
This is how the strips come together at the ends. The left strip will be glued to the right one then eventually trimmed off flush at the point.
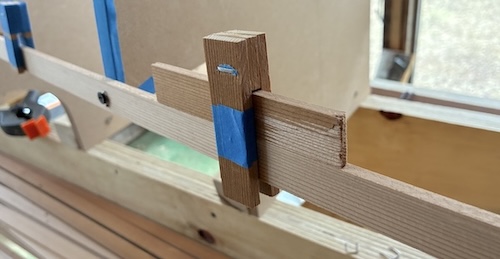
The weather is becoming an obstacle to progress by remaining too cold for gluing. While waiting for the temps to warm up, I made a dozen of these small clamps that slip over two strips to help keep them vertically aligned in the space between forms.
I also obtained this Robo-Bevel tool from Guillemot Kayaks. It magnetically holds a Veritas Mini Shoulder Plane and assists with creating the rolling bevel required for a smooth joint between the square-edged strips.
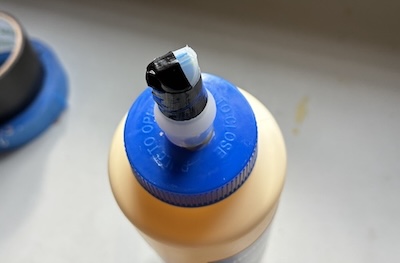
Here I'm trying to limit the amount of glue flow by taping off half of the tip opening.
After several weeks of waiting, a single warm day with temps in the 60ºs (F) arrived and I began gluing in the first strips. I'm using staples to hold the strips to the forms and tape along with my clamps to keep the strips aligned and pressed together between forms.
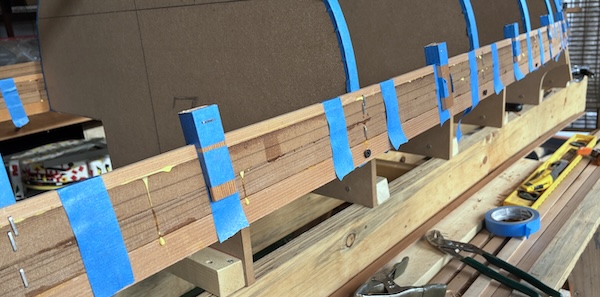
I was able to get two full-sized strips and one accent strip installed on each side.
It's looking like another week before the weather warms up again, so we'll stop here for now. The next section will continue with the bulk of the strips being added.